Mega Speedy; Gehäuse zum Drucken

1 ... 4, 5, 6, 7, 8

Re: Mega Speedy; Gehäuse zum Drucken

von tfhh » Di 8. Aug 2017, 13:54
Moin,

Level42 hat geschrieben:28 mal betrachtet und kein Kommentar ? Mmm...

hab auf AtariAge schon den Daumen gehoben 8)

Ich habe keinen 3D Drucker und keine Erfahrung damit. Ich denke, ich steige frühestens in 3-4 Jahren ein, dann gibt es richtige Drucker und keine Spielzeuge für <500 Euro. Im Moment ist mir das noch viel zu sehr Gefrickel.

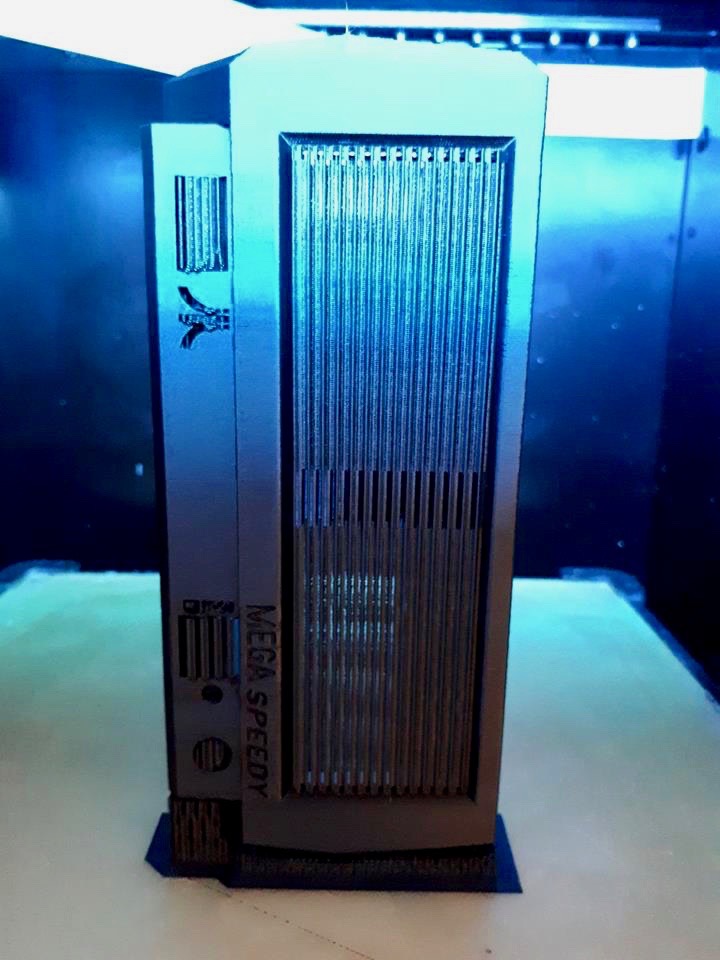
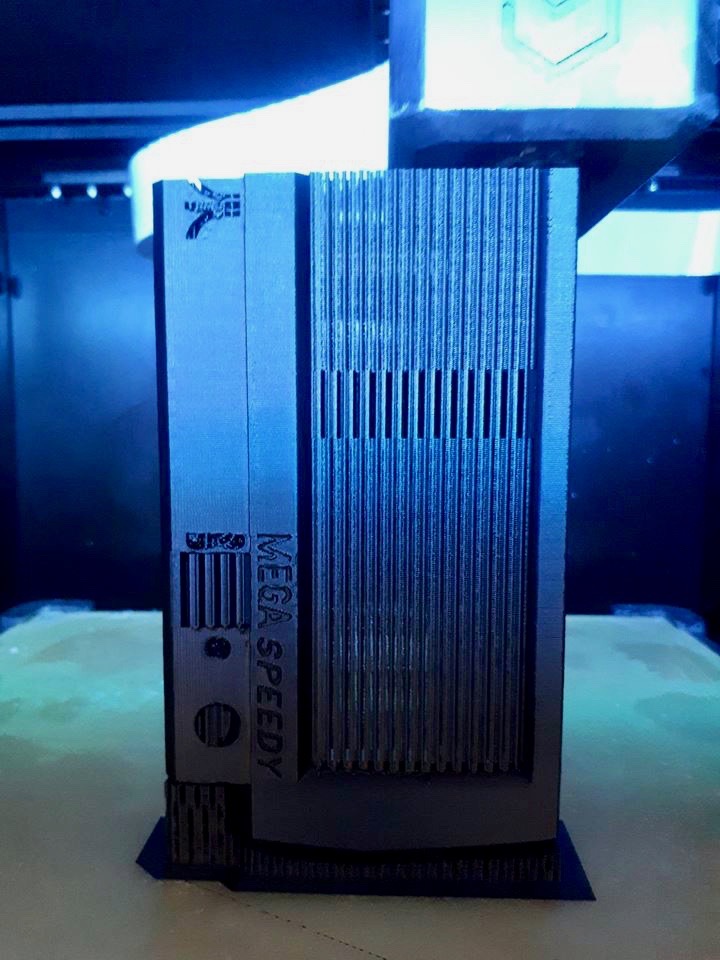
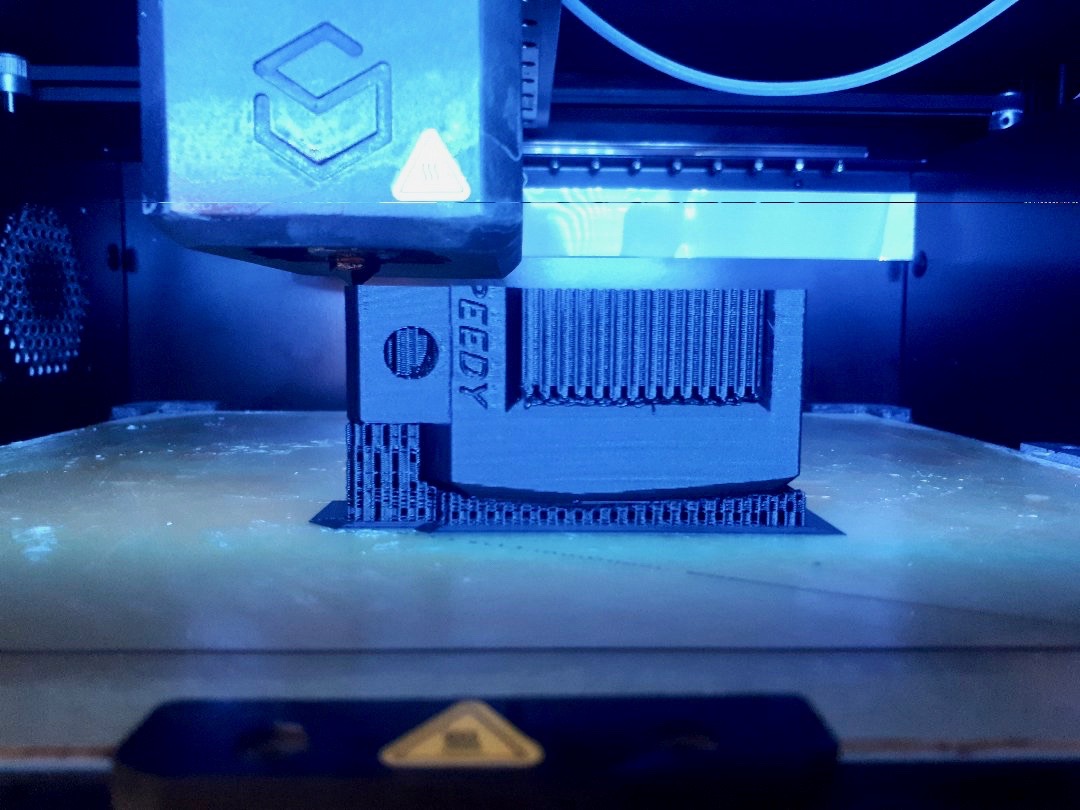
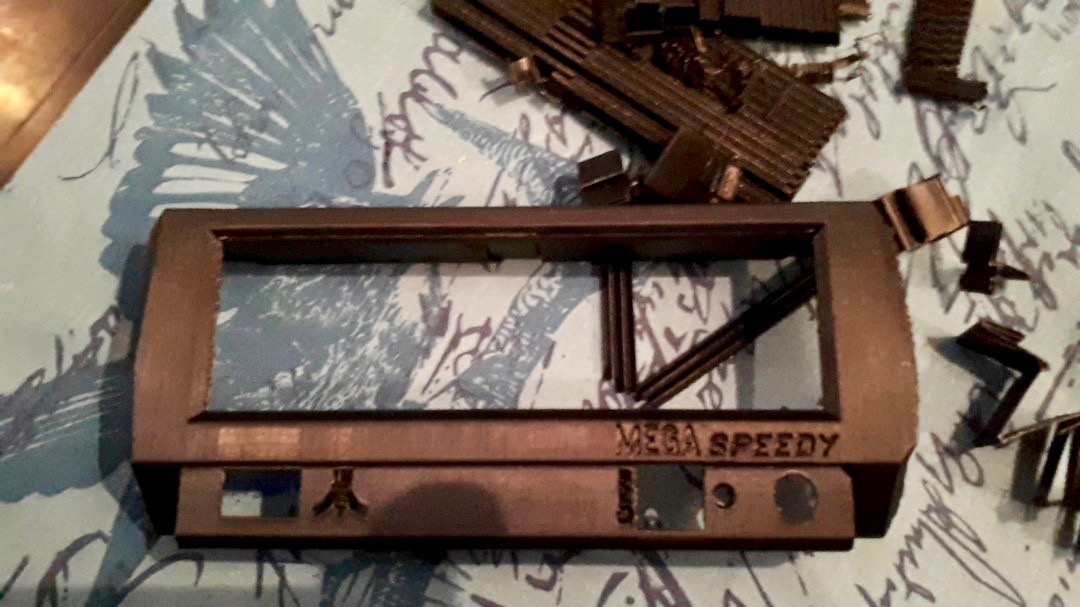
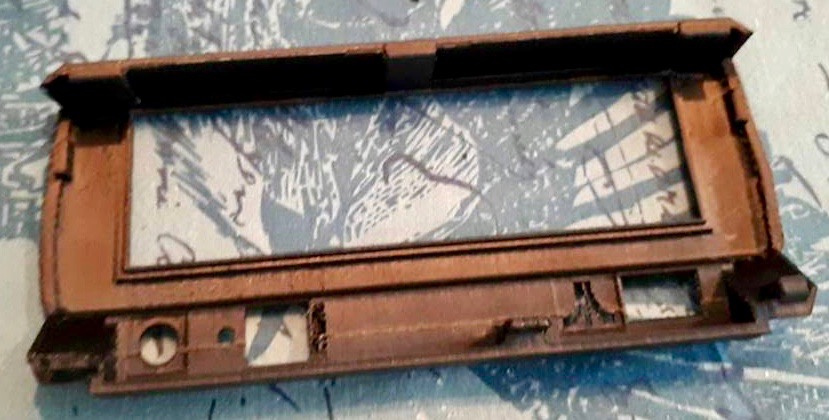
Was ich nur sagen kann: Alles, was Du bisher gemacht hast, finde ich cool. Aber für mich persönlich wäre es am allerschönsten, eine saubere, besser entgratete Version in der richtigen 1050 Farbe zu haben. Die Teile, die Tigerduck gemacht hat in allen Ehren (KEINE Kritik! Kein Gemotze!), aber als ich das so in live an mein Laufwerk geschraubt habe... also zum Einen war da sehr, sehr viel Handarbeit nachträglich nötig, die "Lagen" (? - bin kein 3D Druck experte, siehe oben) sind faserig und lösen sich leicht, und aussehen tut es... nunja. Es ist besser als nichts und ich bin dankbar für die Arbeit, aber wenn es jemand nochmal etwas besser hinbekommt und die Farbe stimmt, bin ich nochmal dabei.

Grüße, Jürgen

Re: Mega Speedy; Gehäuse zum Drucken

von Level42 » Di 8. Aug 2017, 18:05
Vielen dank, das ist sicher gut information. Vielleicht habe ich zu hohen Erwartungen. Ich habe via ein Freund ein sehr professioneler Firma gefunden. http://www.vekashape.nl

Der website seht aus als diese Firma richtet sich auf die profi / semi-profs Markt also ich hoffe die Ergebnisse werden gut sein. Habe aber noch keine Preisaufgabe, dass alles soll natürlich auch bezahlbar bleiben :)

Presentiere hier mein letzte version.

I hope you don't mind I'm using English from here. This allows me to copy-paste it to AtariAge and I'm also SOOOO much quicker writing English :)

Compared to my earlier design I made the following changes;
First I made the Atari logo go "through and through" as to put a milky plastic filter behind it and a (red) LED that simply always lights up after power on. The logo was still on the same location at that time. Of course this would require installing an extra LED and resistor.

Then I filled up the original holes for the density LEDs and put some openings in the shape of the S, M and D letters there. I decided to "fix" the middle part of the D with an extra support that is thin and is sitting receded so it will not block the light of the LED too much yet still let the inner par of the D be supported. Hope this works out when printing ! (Worst case I open up the complete hole of the D...no big problem).

Next I thought: Why not change the boring original Power LED hole to letters too ? So I filled in the hole for the LED again and put the letters ON in there. Next I realized the O would also need a support and....then I figured....why not move the Atari logo there ? So I removed the ON letters again and moved the Atari logo there, removed the "support bulb" on the inside of the bezel and simply made the Logo a bit bigger and going through the entire front.

Now, do note that this will require a bit of modification to the original LED. It is is a plastic support. Not sure yet if this can stay or if it maybe needs to remove and shorten the LED legs. Also, of course, a milky white piece of plastic will have to be put behind the logo holes. Maybe it will turn out that the original LED will need to be replaced with a higher brightness LED. I think I will stil to red, but of course any LED color would work (may need to change resistor value though).

But that's all for later.

Because of the logo being moved to the left side I figured it got a bit "busy" there so I moved the Mega Speedy logo to the right, after all, this is also where the controls are for it.

I just sent this design to the printer. They were already running another test print in black. They said it was no problem as they need nice demo pieces in their shop so apparently they like the design ;)
Schermafbeelding 2017-08-08 om 18.03.51.pngSchermafbeelding 2017-08-08 om 18.03.51.png
Schermafbeelding 2017-08-08 om 18.02.44.pngSchermafbeelding 2017-08-08 om 18.02.44.png

Re: Mega Speedy; Gehäuse zum Drucken

von Level42 » Di 8. Aug 2017, 20:53
Mathy mentioned E instead of M.... I was thinking Medium density but of course the more correct name is Enhanced Density. Strangely I had actually already planned to use the letter E there.....and it also looks better than the M because I had to make that one a lot smaller to make it line up with the S and the D.

Thanks Mathy !

Tomorrow I will be visiting the printing company to look at the test prints they made.....really wonder what quality they will be :) ( and hoping it won't cost me the price of a 1050 in 1984..... :shock::shock::mrgreen: )
Schermafbeelding 2017-08-08 om 20.57.24.pngSchermafbeelding 2017-08-08 om 20.57.24.png
Schermafbeelding 2017-08-08 om 20.55.43.pngSchermafbeelding 2017-08-08 om 20.55.43.png

Re: Mega Speedy; Gehäuse zum Drucken

von Bunsen » Mi 9. Aug 2017, 16:29
Sieht super aus!

Re: Mega Speedy; Gehäuse zum Drucken

von Level42 » Mi 30. Aug 2017, 12:47
First pictures have arrived :)

The printer printed the front "sideways" to prevent "mushy" printing when printing the front first (on the bottom plate) which happened with the first test print.

I like the pics how it "grows". The printing company will also put up a video a bit later :)
21175827_1488241801261073_997878947_n.jpg21175827_1488241801261073_997878947_n.jpg
21244587_1488241461261107_1897010564_n.jpg21244587_1488241461261107_1897010564_n.jpg
21215879_1488241047927815_223353019_o.jpg21215879_1488241047927815_223353019_o.jpg

Re: Mega Speedy; Gehäuse zum Drucken

von Level42 » Mi 30. Aug 2017, 12:51
More pics.

I'll need to do a bit of sanding. It looks like the spot where I removed the Power ON/OFF letters has left a very very shallow area.

Also the Atari logo is a bit too detailed to survive completely but we'll see how that turns out :)

Quite pleased, picking it up this afternoon and we will see how it fits. If it's not a good fit, the printer wanted to keep this for his "expo" :D
21216162_1488242884594298_1306781800_o.jpg21216162_1488242884594298_1306781800_o.jpg
21222810_1488242094594377_1704512918_o.jpg21222810_1488242094594377_1704512918_o.jpg
21208582_1488277094590877_222628021_n.jpg21208582_1488277094590877_222628021_n.jpg

Re: Mega Speedy; Gehäuse zum Drucken

von Franky » Sa 9. Nov 2019, 19:17
Möchte den Thread nochmal aufwärmen.
Frage:
Hat jemand in der letzten Zeit die Frontblende für die Mega Speedy zur vollsten Zufriedenheit nochmal drucken lassen?
Ich wünsche mir eine richtig gut passende Blende, möglichst ohne (viel) Nacharbeit.
Wenn ja,bitte ich um genauere Infos über die Druckdatei,das verwendete Material,die Farbe und gegebenenfalls nenne die Firma,die sie gedruckt hat.Die 3D-Drucktechnik hat sich ja in der Zeit weiterentwickelt.
Es gibt auch neue Verfahren.
Danke
Franky

Re: Mega Speedy; Gehäuse zum Drucken

von tfhh » Mo 11. Nov 2019, 11:44
Moin,

Franky hat geschrieben:Hat jemand in der letzten Zeit die Frontblende für die Mega Speedy zur vollsten Zufriedenheit nochmal drucken lassen?
Ich wünsche mir eine richtig gut passende Blende, möglichst ohne (viel) Nacharbeit.

Das suche ich auch noch... aber, soweit mir Leute, die davon etwas verstehen, mitgeteilt haben, sind die kursierenden Files wohl "suboptimal". Es gibt zuviele kleine Stege und andere Dinge, die ein 3D Drucker nicht optimal abbilden kann.

Das Hauptproblem ist aber, daß es keine Megaspeedys gibt. Auf AtariAge gibt es einige User mit guten Druckern (Ultimate, Prusa, ...), die aber keine Megaspeedy haben. Demzufolge ist da kein Interesse & Möglichkeit, die Files zu korrigieren oder neue zu machen...

Gruß, Jürgen

Re: Mega Speedy; Gehäuse zum Drucken

von Franky » Mo 11. Nov 2019, 13:08
Danke, Jürgen.
Schade, aber da weiß ich wenigstens bescheid.
Gruß
Frank
1 ... 4, 5, 6, 7, 8